Printing labels are significant but seem like a challenge in a business. Labeling is crucial as it is a bridge connecting the transactional world to the physical world. We fulfill the needs of customers by creating labels that help identify products, display prices, indicate locations, facilitate receiving and shipping, and mark units, boxes, and pallets/license plates. Beyond simple labeling, there’s also necessary to apply RFID marks on products and occasionally generate plastic badges or tickets. The potential is vast for streamlining processes and enhancing data accuracy through automation.
Many experts recommend using BarTender for printing labels in Dynamics 365.
However, integrating it with Dynamics 365 may require you to know more configuration knowledge. Microsoft has provided complete documentation, yet it is sometimes challenging to understand. In this article, we will help you simplify the process.
But, What is BarTender?
The Bartender is a barcode label design and printing software that is widely recognized as a global leader in its field. It is one of the best barcode warehouse management software, providing a range of features and capabilities to help organizations design, print, and manage barcodes, labels, and RFID tags.
How do i create a barcode in dynamics 365?
Utilizing BarTender within Dynamics 365 is possible, although no defined plan is in place. During Wave 2020 Wave 1, Microsoft initially considered its integration, but it was subsequently deferred for future enhancements. In the interim, we devised an approach for labeling through BarTender using the RestAPI.
So, how to integrate BarTender in Dynamics 365? Let us walk you through the steps.
Steps of integrating BarTender into Dynamics 365
Step 1: Create the label design in BarTender
Their initial step involves using BarTender to create the label. They set up the Named Data Sources and input the necessary data. This includes three distinct data elements: AccountNum presented in QR code format, along with CustomerName and CustomerAddress. Sample data has been inputted into each of these named data sources.
Once the label design is ready, the next stage entails populating the design with data through a web service.
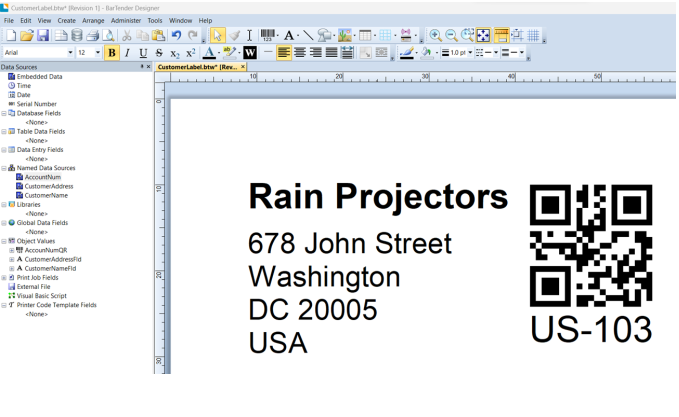
With the complete label design now, the next step for them involves populating this design with data, and they plan to do so through a web service.
Step 2. Use the BarTender integration builder to create a WEB-Service.
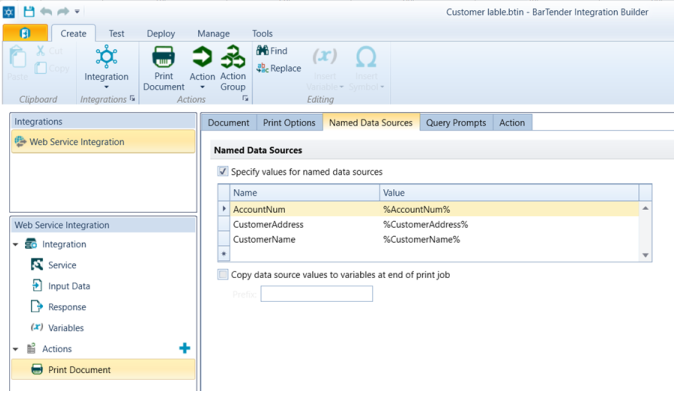
The BarTender integration builder proves to be an excellent tool, simplifying the process of constructing a REST-based integration service. The user can effortlessly import the pre-existing label design and establish a variable for each named data source.
Step 3. Test the WEB-Service.
When it comes to testing label printing, the individual’s tool of choice is Insomnia. Using this platform, they find it remarkably simple to put their new web service to the test. They create a “Post” request, wherein a JSON format is structured as follows. They proceed to input values into the variables as needed.

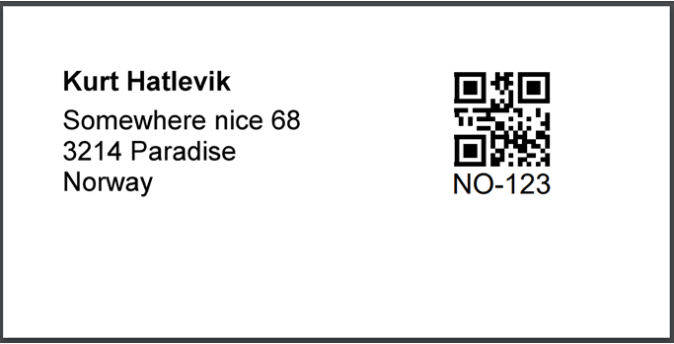
Upon clicking the “Send” button, the individual observes that Insomnia promptly responds, confirming the successful printing of the label. They had previously indicated their preference for a PDF rendition of the label, and the outcome aligns with their selection. The received PDF version of the label is as follows:
Step 4. Deploy the WEB-Service
The next thing to do is deploy the service; you can find the instructions for this in the BarTender documentation.
Right now, we’ve got a functional REST service that can send labels to a printer using a JSON file and a URL. Our next move is to make Dynamics 365 F&O create a similar JSON from data and send it to the same web service.
Moving to the next phase
Collect and send data from Dynamics 365 to the web service
To achieve this, you need to choose to create a simple extension. Its goal is to generate JSON from any Dynamics 365 data. Let’s have a look at how to use this extension from a user’s point of view.
Screen 1: Label Types
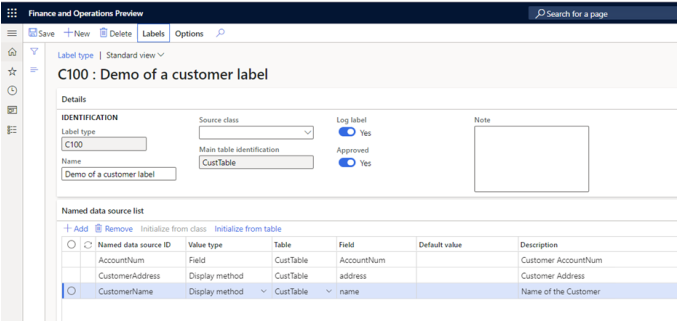
The first screen being created serves as a platform to define label types. Each label type is given an ID and a name in this setup. Users also have the option to connect the label to either a Main table identifier or a source class, which is particularly useful in special cases. Furthermore, connections to related tables can be established through a query relation. Following this step, users add named data sources, where each source can encompass a field, display method, class method, or free text. Additionally, the option to include default values is available.
Screen 2: Enable the ability to print labels from any screen
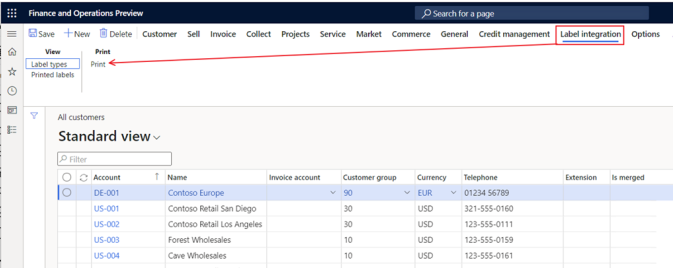
The next step involves creating an extension to SysSystemDefinedButtons. This enables the dynamic addition of a generic menu to ALL forms. The menu becomes visible only when there’s a label defined on any of the data sources within the form. In the presence of such a label, a “View and Print” menu is displayed. The capability to multi-select records and send them for printing or logging is also present.
Screen 3: Printed labels
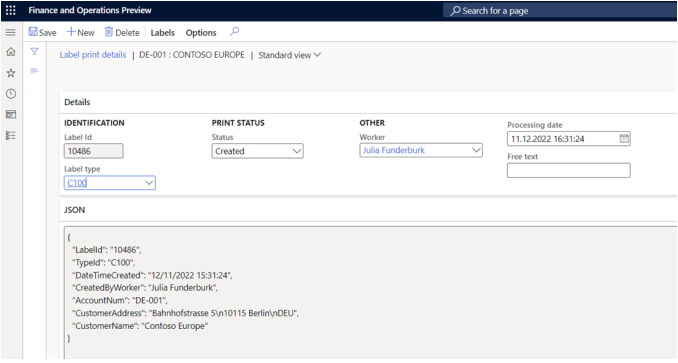
Since each print can be logged, a unique label ID is assigned to every generated label. Additionally, all named data source values are populated according to the label type.

The generated JSON will also be visible when examining the “header” view.
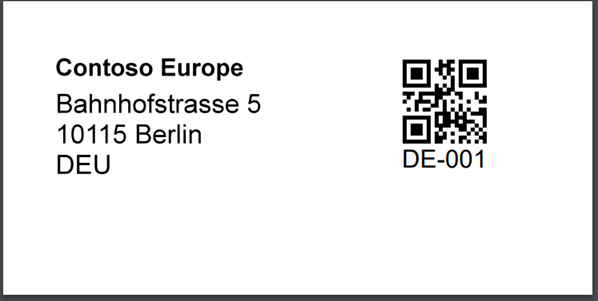
Finally, you will get the label below:
Get in touch
See, a small effort can do wonders for you. However, stepping directly into integration steps may be too much for you. So, here are the experts of DHRP ready to help you anytime. All you need is to get in touch with the team. Let us analyze your needs, and we assure you the best of our services.
We get it; business is already giving you a hard time. Let’s make labeling easy together. Just believe that possibilities are endless only if you give them a chance.


