PowerApps provides exceptional flexibility and efficiency in creating customized forms for a variety of business applications. Its ability to create multi-step forms is a significant development in user interface design, allowing developers to break down difficult data entry jobs into simpler, more manageable sequences. This improves not only the accuracy of the obtained data but also the overall user experience by making form completion less intimidating for users.
However, since this is new for many people, they still need to know the steps for creating multi-step forms in power apps. In this article, we will take you through the whole scenario step by step using the multi-step form.
What Does it Mean to Work with Multi-Form in PowerApps?
Dynamics 365 PowerApps transforms how users interact with forms by adding live status indications and reactive navigation buttons. These elements walk users through the form-filling process, offering clarity on progress and what to expect at each stage. It decreases the risk of overwhelming consumers with too much information at once while also considerably lowering form abandonment rates.

Multi-step forms scenario
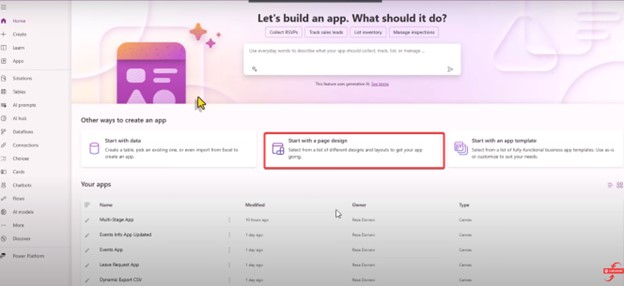
To begin with the forms, we need a scenario. In our case of power Automate for multi-step forms, let’s start by designing the app using the list of Travel Requests. This has information about the user’s travel needs and requests. We will start by creating an app by navigating to “start with the page design.”
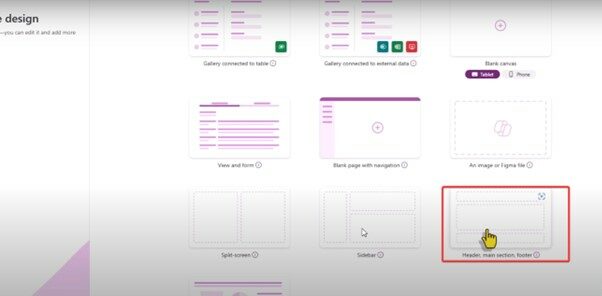
Further, we will choose a responsive design template for the app.
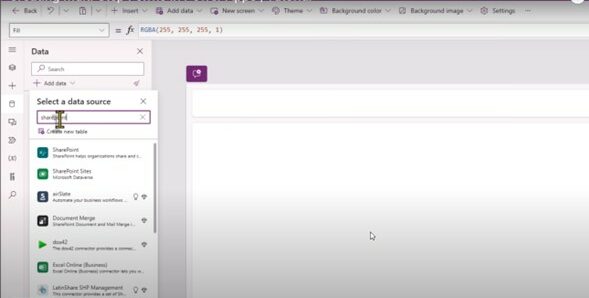
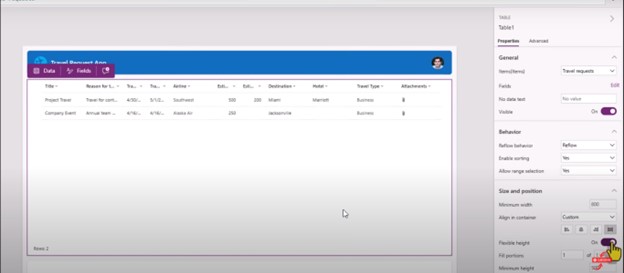
Next, we will connect the page to the data sources, set up modern controls and themes, and choose the header accordingly. Once we set up the page’s alignment and other settings, we will be all set to move to the next step of building a multi-form. So, as per your scenario, set up the page layout, and let’s move to the next step.
How to build a Modern Multi-step form experience in Power Apps
Following the same scenario, we will move the multi-step form experience. Here, we will click on “New Screen” and pick one of the modern screen templates, which is named “Approval Test.

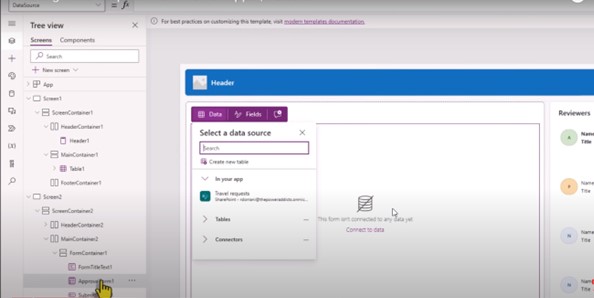
Here, we will create a variable from the Onvisible screens.
- Create a variable named varStep to track the current step (set to 1 initially).
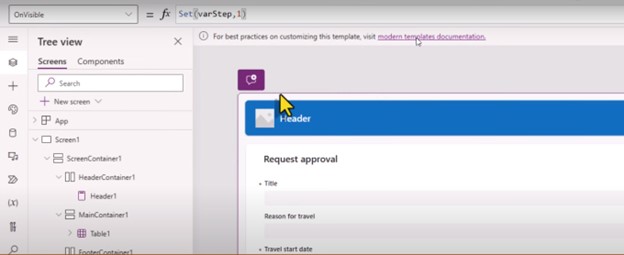
- Use the Set function to update varStep based on user interaction (e.g., next/previous buttons).
- Control the visibility of data cards in each step using the Visible property:
- Set Visible to true for cards you want to show in a specific step (e.g., Visible = varStep = 1).
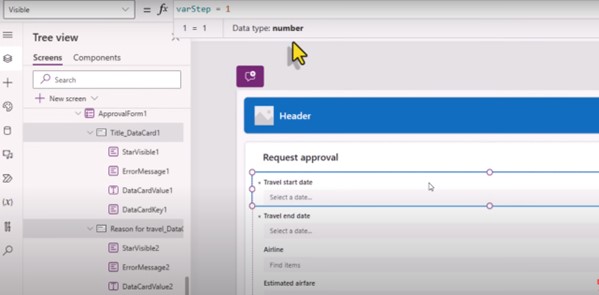
- Set Visible to false for cards hidden in that step.
Further, you can add the button for “New Request” using the ResetForm and SubmitForm functions for ApprovalForm1 in our case. Set the function of Navigate to redirect your user to screen 2 when they submit the request. You can add and change the buttons using the SubmitForm function, whether in the header or footer or if you want to move the footer above.

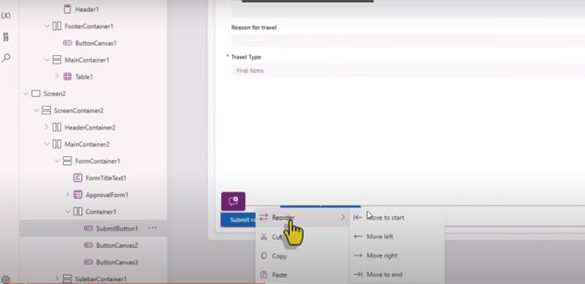
You can change the variables accordingly to indicate the steps. There you have your form settings. Click the previous and your user will be navigated to the first step; if they click next, they will be led to step 2. Similarly, you can set all the steps as needed through simple drag-and-drop.
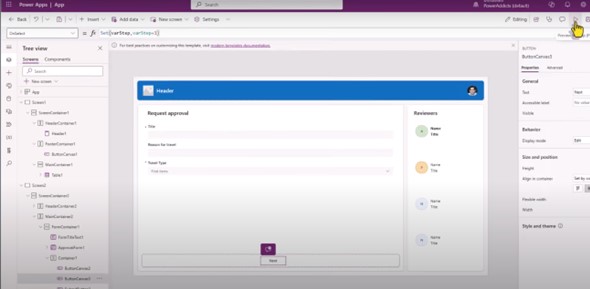
Show Status indicator of current step number of Form
Our next step is to show the steps. In the Reviewers bar, change it to the steps. When you click on it, you will see the gallery with the array of data.
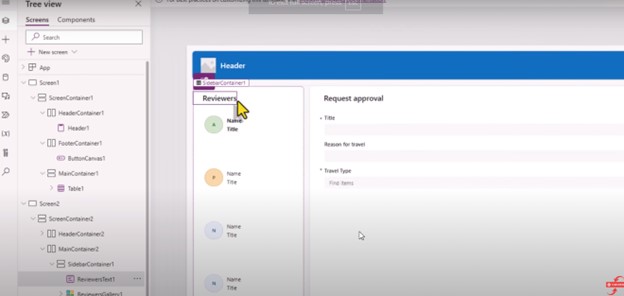
Once you have Inserted a gallery control to display step indicators, set the Items property of the gallery to an array of data representing each step (e.g., [{ Title: “Travel Info”, Step: 1 }, { Title: “Travel Details”, Step: 2 }, …]).
Use conditional formatting to change the colour of the step indicator based on the current step (varStep).
Display the step number and title within the gallery. Further, you can always set a certain button’s alignment, share, and potion using the features and functions.

Multi-step form validations
In the end, you have to understand that certain information is necessary according to the data source. The validation only works if the user submits the request.
Implement validation logic using the If function and error messages. In the OnSelect property of the “Next” button:
- Check if the current step (vStep) and required fields for that step are valid (e.g., If(varStep = 1 And Not(IsValid(TitleCard.Text, ErrorMsg)), …).
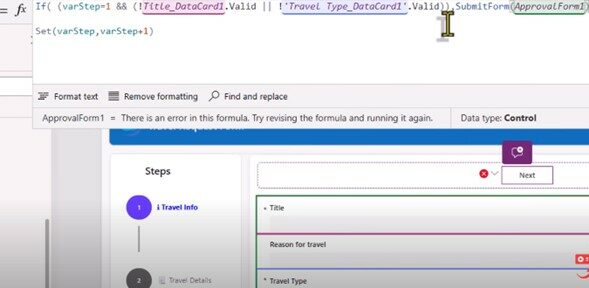
- If valid, increment varStep to move to the next step.
- If invalid, display an error message to the user.
Repeat the validation logic for the “Submit” button, checking for validity in all steps before submission.
Final Steps – Demo of multi-step forms in PowerApps
Finally, you can check out the functions by adding the data, submitting the form, and testing the New-request button. Your multi-form is ready to go once you have all the functions working.
However, if you need to do one demo for Microsoft Power Platform forms, we at DHRP can show you. Our experts have the knowledge and experience to share with you to make your Power Apps multi-step form experience smooth and easy. So, let’s talk about getting forward with it.
All the screenshots in this blog are taken from this video. For video tutorials, please visit their channel.


