Data is everything in these times of business, so having essential documents accessible is essential. While PowerApps does offer the ability to create PDFs, the process can be challenging. As a result, many businesses seek solutions for generating PDFs within PowerApps without relying on Power Automate, especially for tasks like creating invoices, permits, and other important documents.
You might think you need developers or consultants to help you, but you really just need a simple guide to navigate the process.
So, if you’re wondering how to use PowerApps to make PDFs of your important data, here’s a step-by-step guide.
This article will discuss the two scenarios mentioned in the title for downloading PDFs from PowerApps Forms. Read more to understand the steps.
Step-by-Step Guide to Generate and Download PDFs Directly from PowerApps Forms
Previously, we explained how to transform your SharePoint lists into Dataverse tables in PowerApps. Today, we will discuss 2 scenarios of PowerApps Forms for PDF generation separately and help you understand the process as you follow it.
Here is your step-by-step guide.
Scenario 1: Emailing the PDF Document as an Attachment
This is the 1st scenario of PowerApps PDF generation. It requires some complex steps, but we will make it simple for you.
Step 1: Prepare Your PowerApp
Design Your Form:
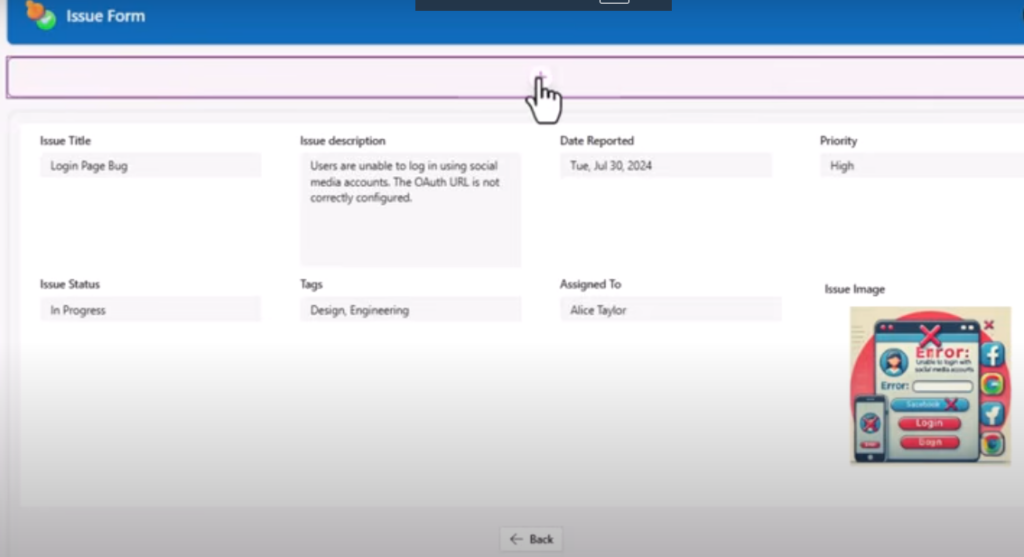
In your PowerApp, set up a form screen using a modern screen template such as “Header and Form.” Ensure the form is fully responsive, leveraging modern container controls for better layout management.
Add a Container:
Insert a horizontal container on your form screen. Set its height to a fixed value (e.g., 50) and place action buttons inside it.
Insert the Email Button:
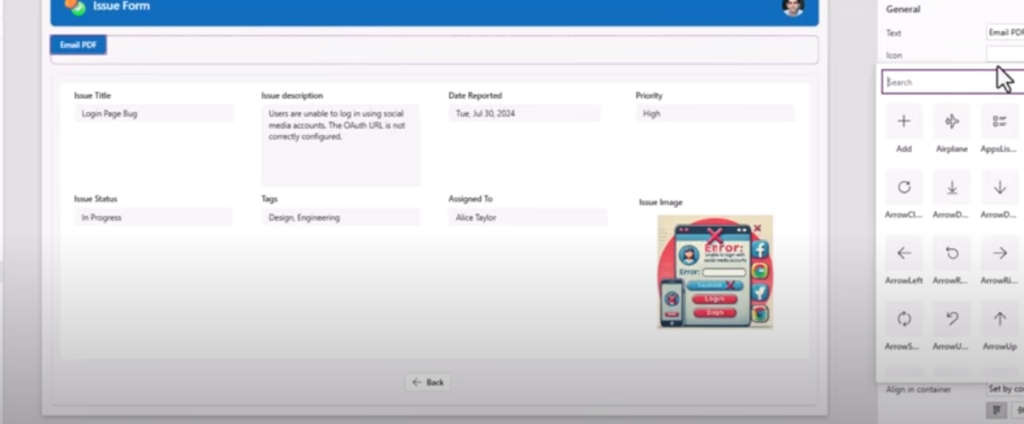
Add a modern button control to the container. Label it “Email PDF” and choose a mail icon for visual clarity. This button will be used to trigger the email action.
Step 2: Enable PDF Functionality
Configure PDF Settings:
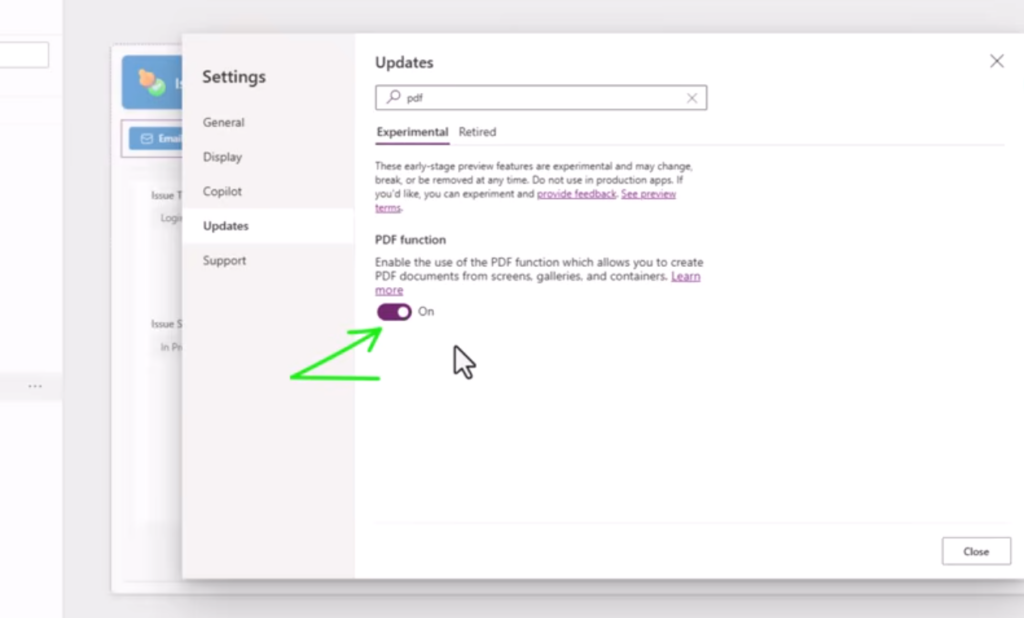
Navigate to Settings → Updates in PowerApps and enable the PDF function. This setting allows you to Create PDFs in PowerApps documents from screens, galleries, and containers within your app.
Step 3: Set Up the Email Action
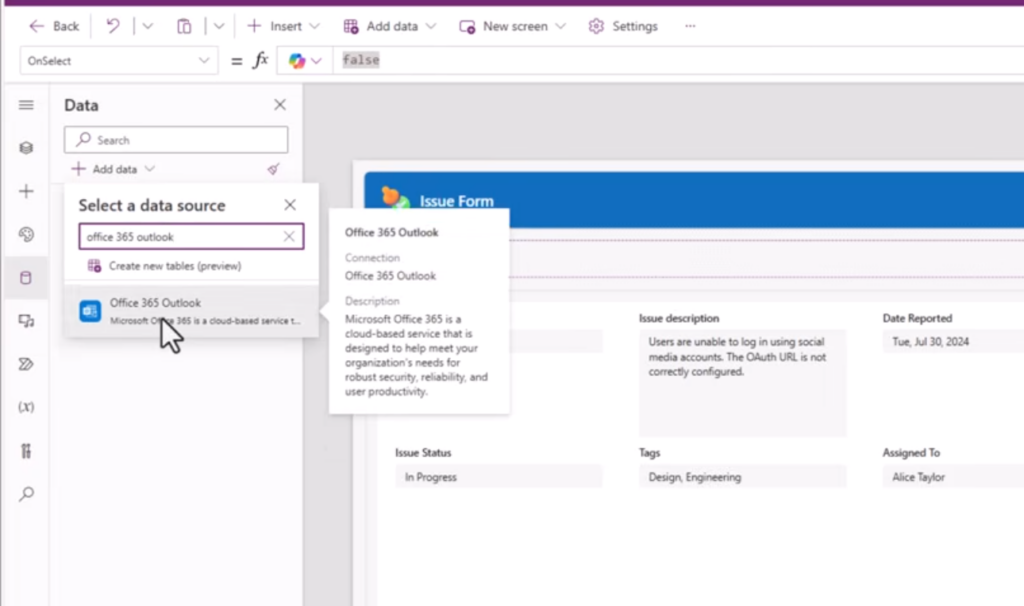
The next step is to set up the email action. All we need is to navigate to the search and type Office 365 Outlook. Open and perform the rest of the steps:
Configure the Button:
Set up the OnSelect property of the “Email PDF” button to use the Office365Outlook.SendEmailV2 function. Here’s how you can configure the email:
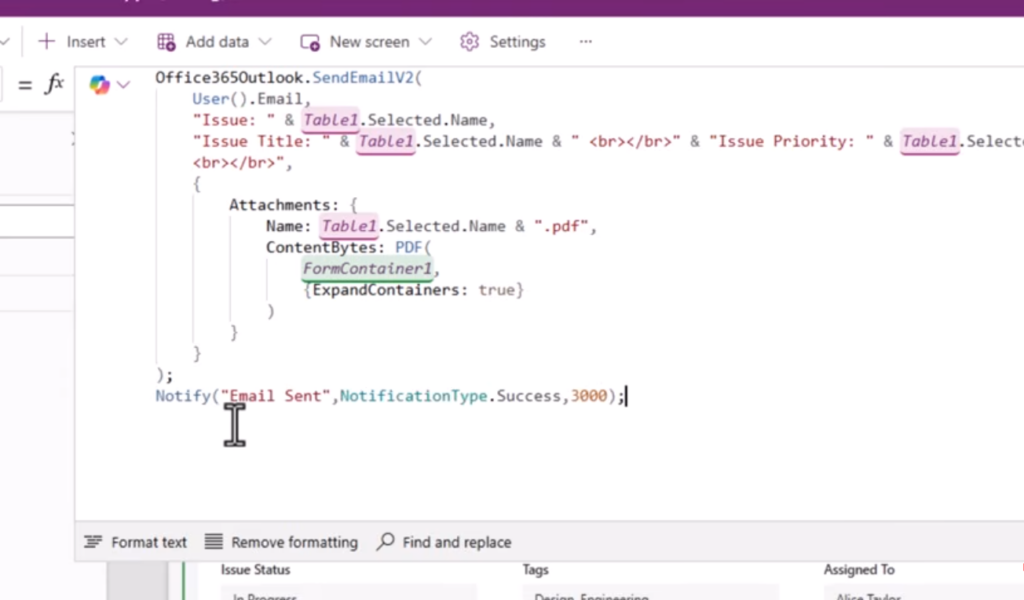
This function sends an email with the PDF attachment generated from the form control.
Test Your Setup:
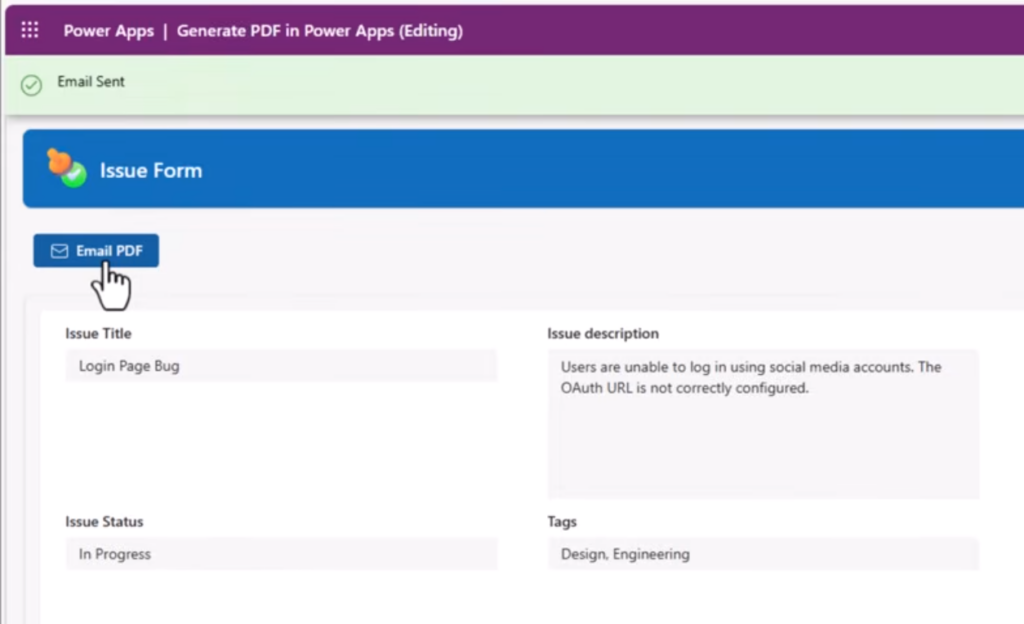
Click the “Email PDF” button to verify that the email is sent with the PDF attachment correctly formatted. You can test it on your mobile app to ensure that you have achieved the goal, everything is working fine, and data is available as you want.
Step 4: Fine-Tune PDF Output
Manage Form Layout:
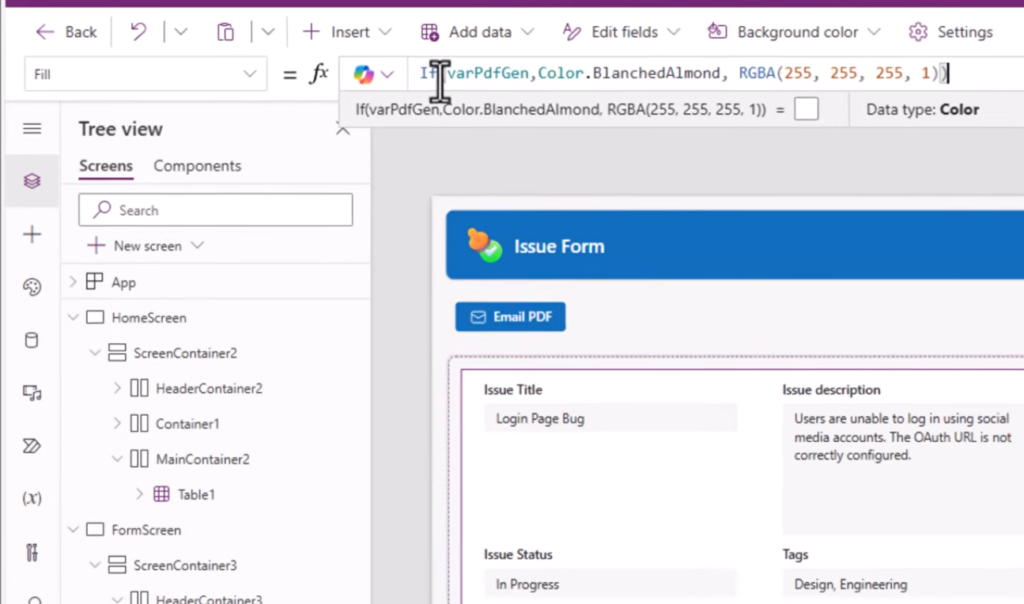
Ensure that unwanted elements, such as buttons, are not included in the PDF. Use a variable (varPDFGen) to control the visibility of elements during PDF generation.
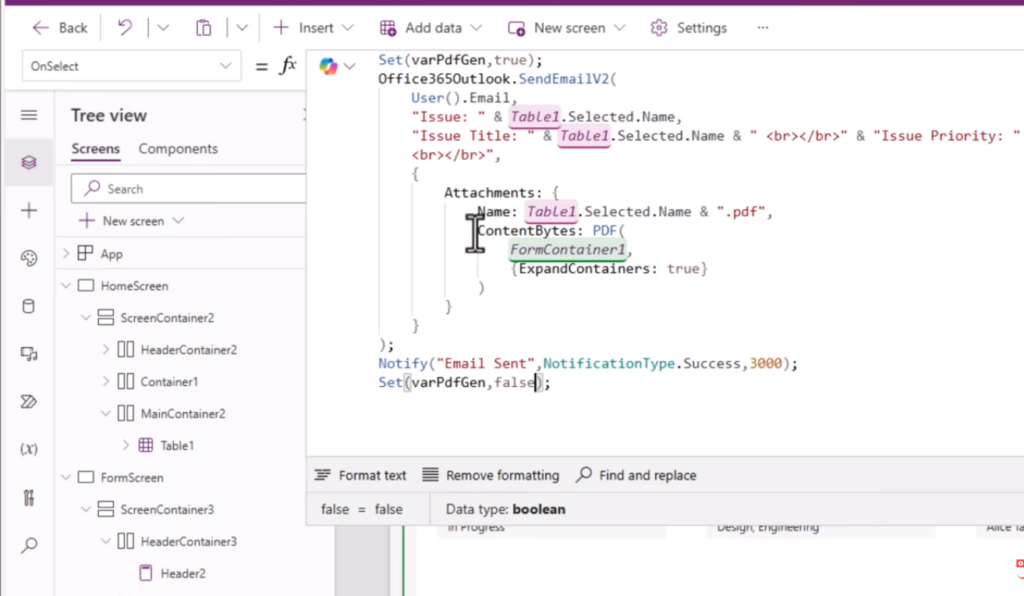
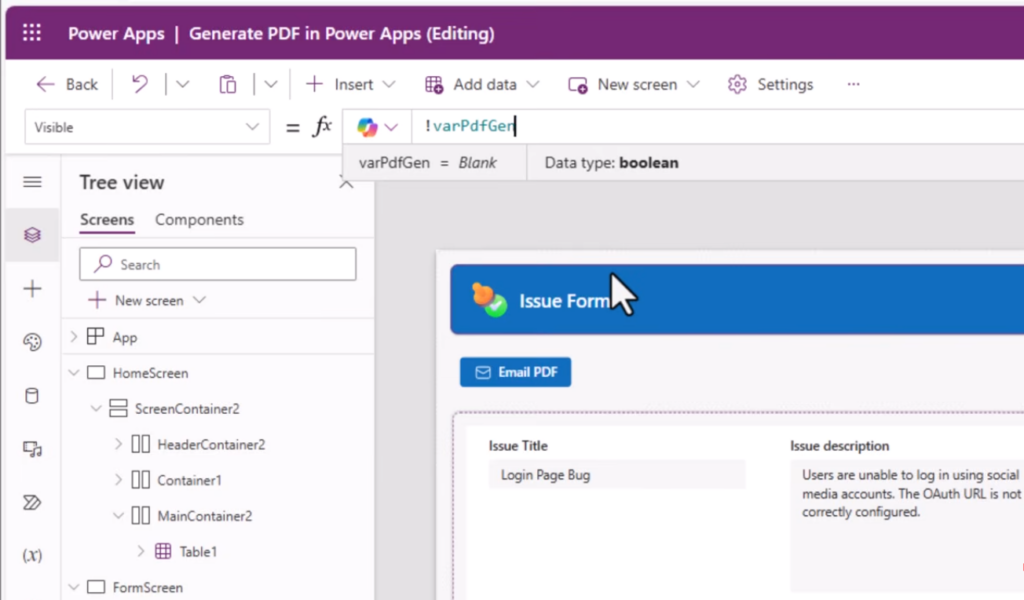
Initially, when you test, you might not see the button in an email. However, once you set the color to a different one, you will be able to see it. To change the colour, apply the following code.
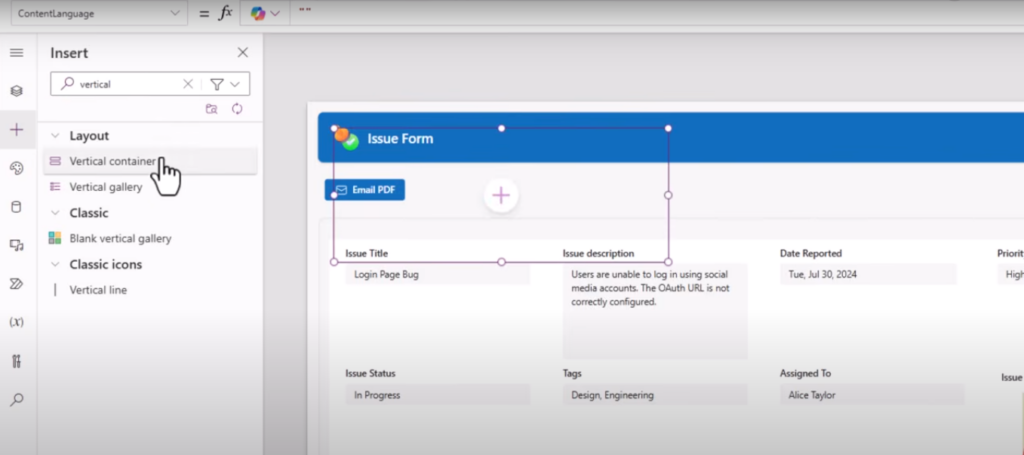
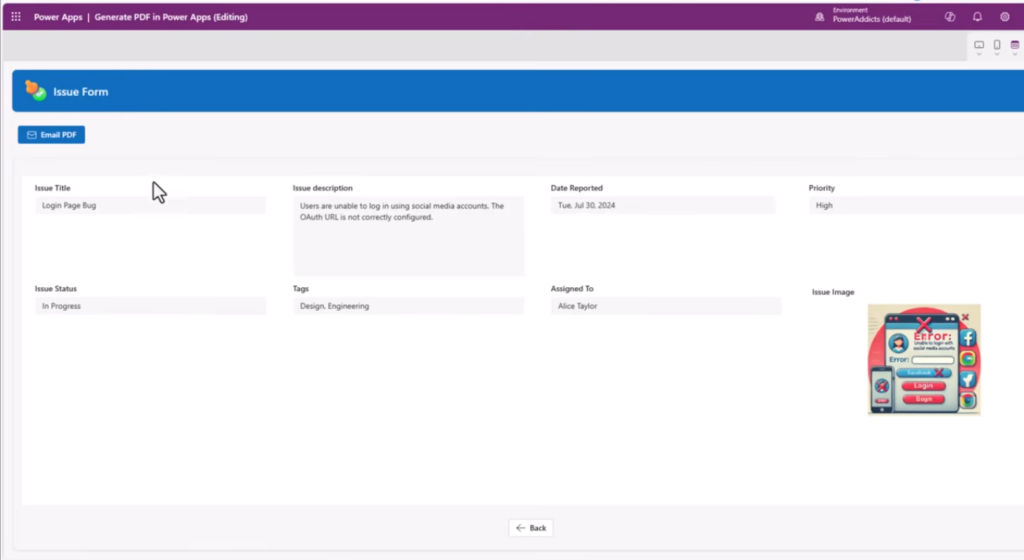
Scenario 2: Allowing Users to Download the PDF Directly from PowerApps
This is another scenario where you can allow users to Download PDFs from PowerApps Forms directly from PowerApps.
Step 1: Generate the PDF Content
Now, we will create another button, “generate PDF,” to allow users to PowerApps Forms PDF download.
Add a Download Button:
Insert a button for generating the PDF. Set its OnSelect property to use the same PDF generation logic. Apply the code below:
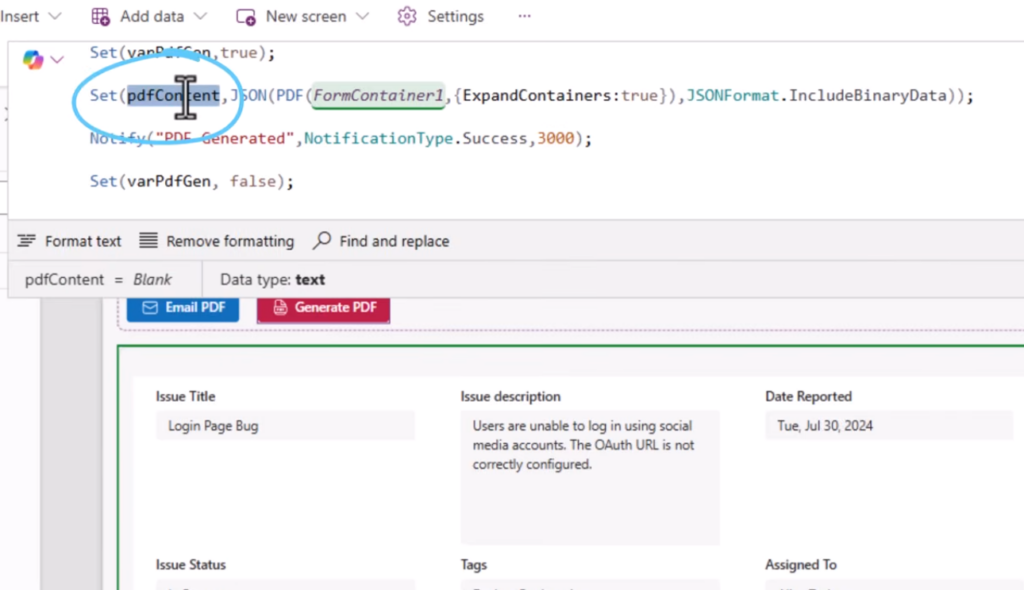
However, this contains the content, but how will people download it? Let’s solve this issue for you, too.
Setup the Download Control:
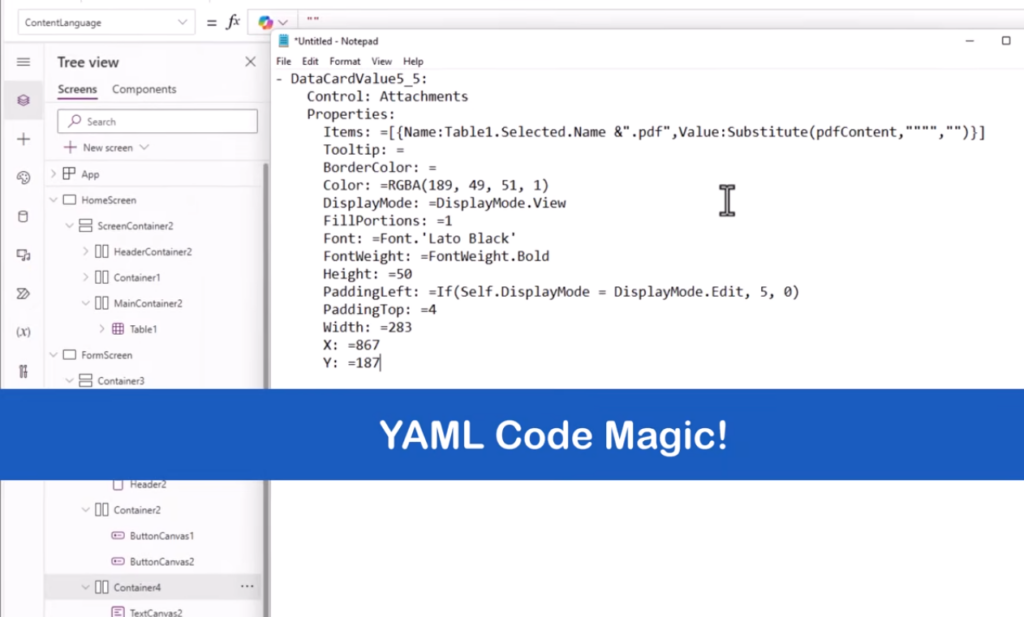
This will allow users to click and download. Now, we can use the YAML code to do it. We will show you this in the next steps.
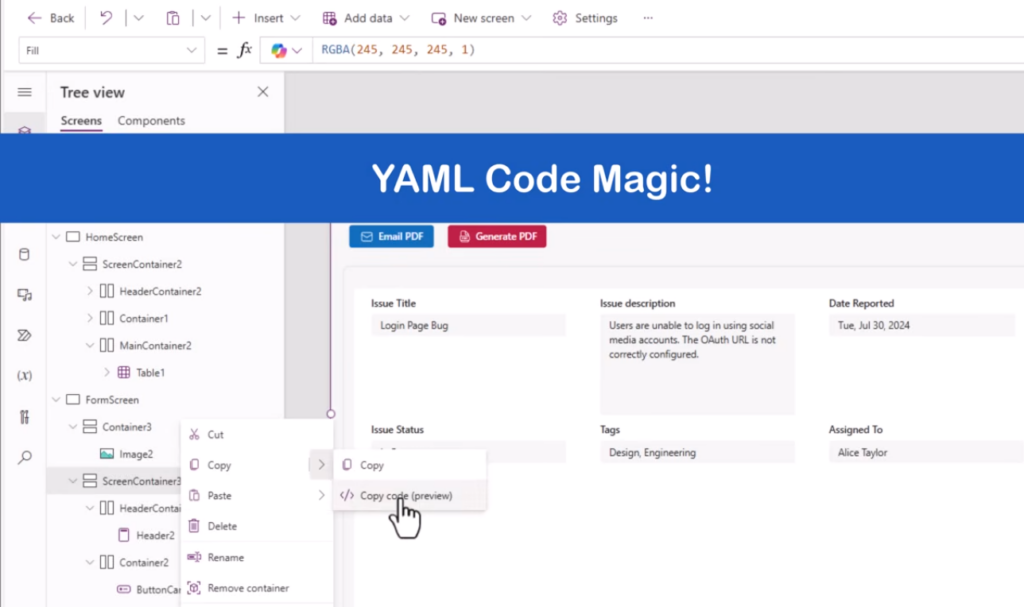
Insert a container with a text control labelled “Download.” Paste the following YAML code to add an attachment control for downloading the PDF:
Configure the container’s visibility to ensure it only appears when PDFContent is not blank. You can apply the following code for it.

Configure the container’s visibility to ensure it only appears when PDFContent is not blank. You can apply the following code for it.
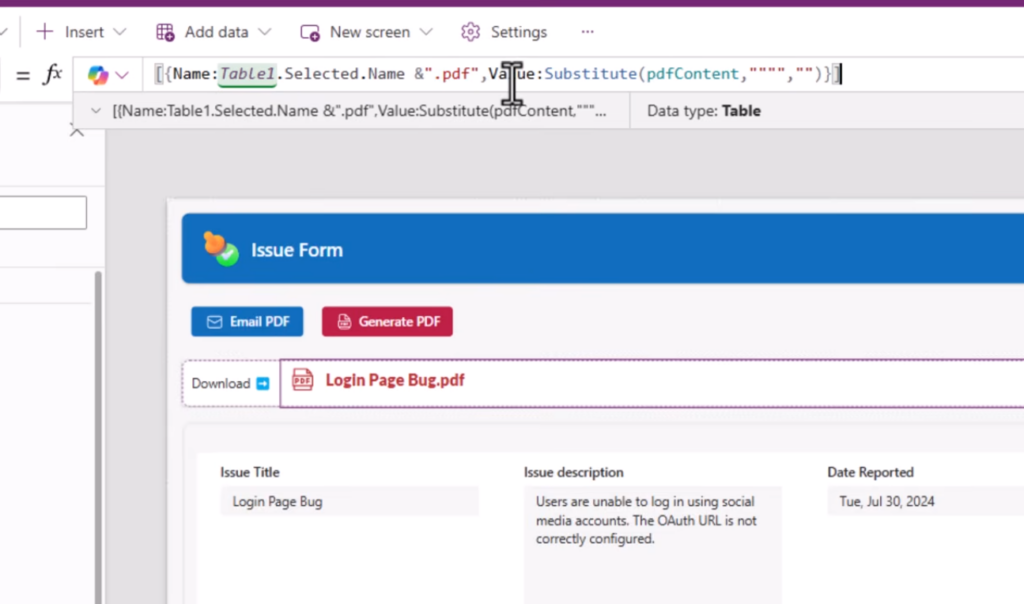
Step 2: Test the Download Feature
Generate and Download:
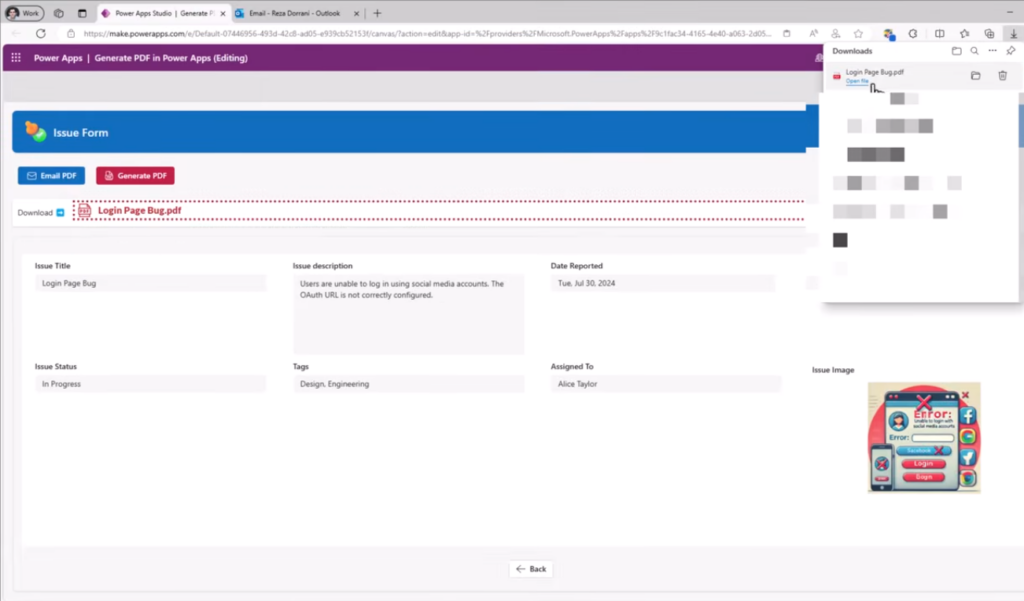
Click the button to generate the PDF and ensure the download button becomes available. Verify the download functionality and check the PDF file for accuracy. Here, you can see that clicking the button will download the PDF right away.
Bottom Line
Now, you have the complete process. So, this is one of the best Power Automate alternatives for you. Simply follow the steps, and if you want to try new things, you can do so yourself.
If you want more integration or developer help, let the DHRP team be your guide. Our expert team has created multiple tutorials on PowerApps, including how to build a responsive modern gallery to help you learn this platform. For more convenience and easy navigation, reach out for any new Dynamics 365 modules and PowerApps.
All the screenshots in this blog are taken from this video. For video tutorials, please visit their channel.


